You can add a daily/ weekly, Fast Track or Multiple timesheet to a matrix. Simply follow the steps below for the method you normally use to add your timesheets.
This tutorial assumes knowledge of adding a basic timesheet through Clarity365.
Assigning a daily/ weekly timesheet to a matrix:
For help adding a regular daily timesheet please click here.
- Go to Main Navigation > Time Management > Manage Timesheets
- Select the ‘Add Timesheets’ tab
- Choose the date you would like to add the timesheet for
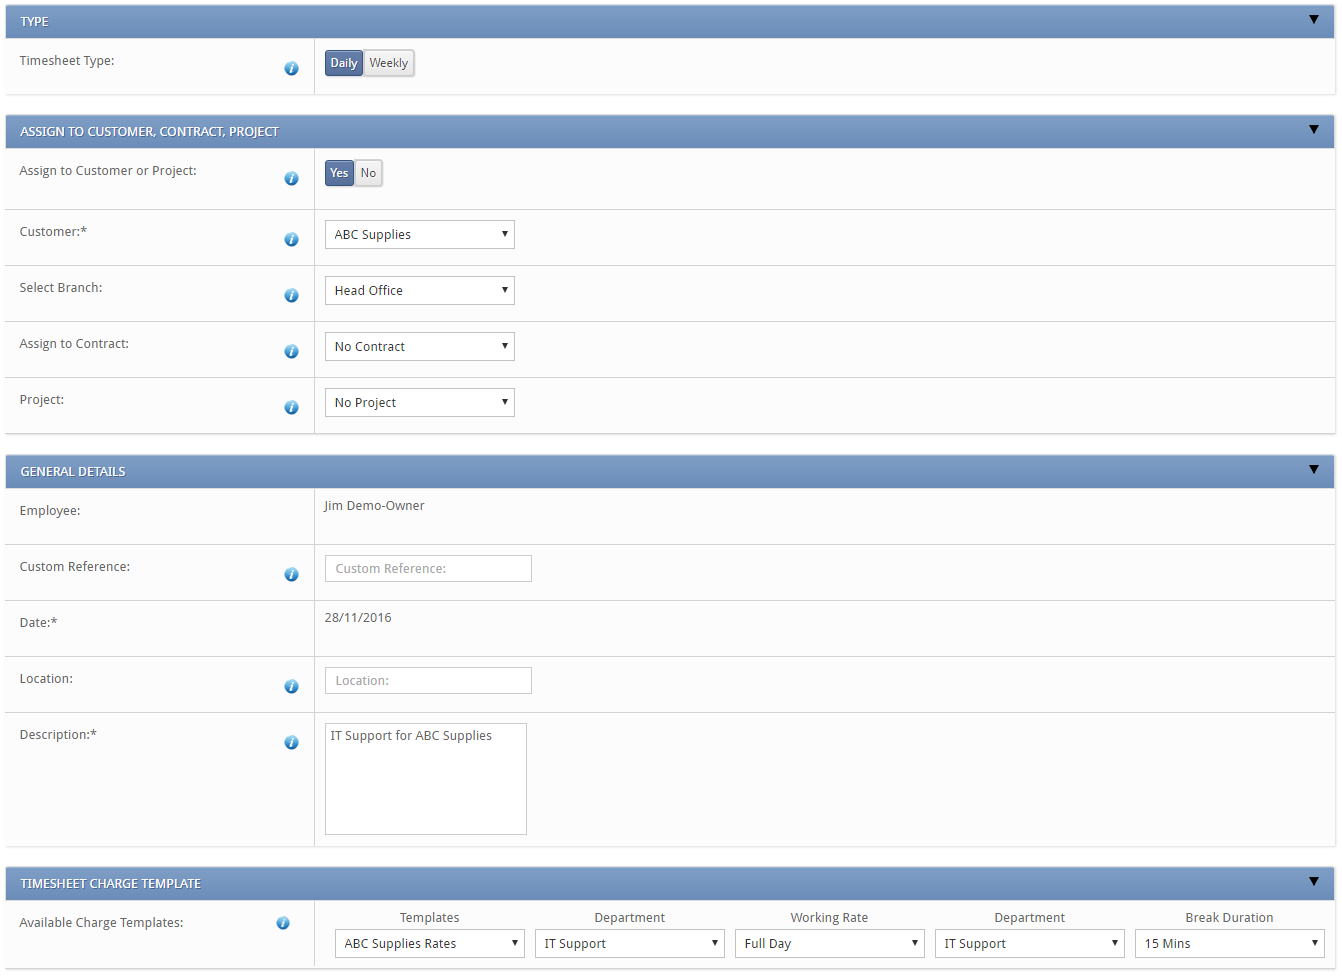
- Choose the timesheet type either Daily or Weekly
- Assign to the customer/ contract/ project as you normally would, and enter a short description
- Under Timesheet Charge Template you will see ‘Available Charge Templates’ and a drop down box containing templates. Select the template you would like to use from this. (If you are unsure of the template to use, please contact your administrator.)
- The rest of the drop downs will show. Select an option from each of the drop downs, in the example below these are Department, Working Rate, Department & Break Duration. Please note: you must select an option from ALL the drop downs.
- Continue filling in the timesheet as normal
- Click Submit to submit the timesheet(s) for authorisation.
Assigning a Fast Track timesheet to a matrix:
For help adding a regular fast track timesheet please click here.
- Go to Main Navigation > Time Management > Manage Timesheets
- Select the ‘Fast Track Timesheets’ tab
- Choose the date range you would like to add the timesheets for
- Assign the time to the customer/ contract/ project as you normally would
- Under Timesheet Charge Template you will see ‘Available Charge Templates’ and a drop down box containing templates. Select the template you would like to use from this. (If you are unsure of the template to use, please contact your administrator.)
- The rest of the drop downs will show. Select an option from each of the drop downs, in the example below these are Department, Working Rate, Department & Break Duration. Please note: you must select an option from ALL the drop downs.
- Complete the rest of the fast track timesheet as normal
- Click Submit to submit the timesheet(s) for authorisation

Assigning a Multiple timesheet to a matrix:
For help adding a regular multiple timesheet please click here.
- Go to Main Navigation > Time Management > Manage Timesheets
- Select the ‘Multiple Timesheets’ tab
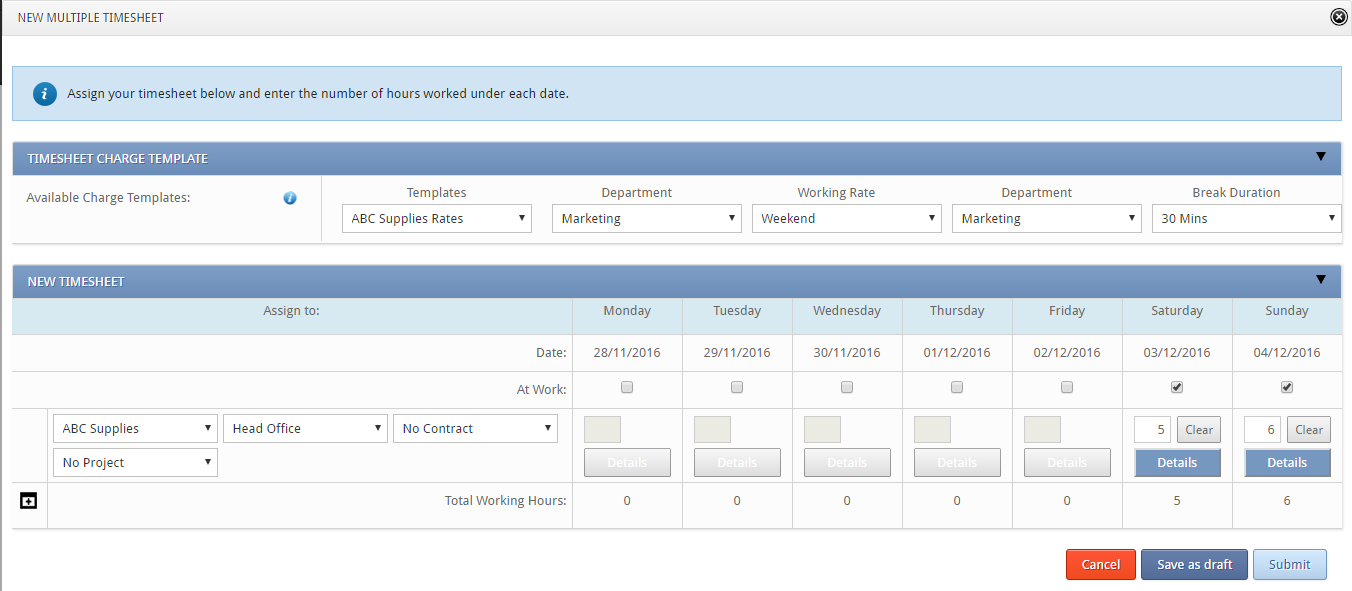
- Choose the date you would like to add the timesheet for
- Under Timesheet Charge Template you will see ‘Available Charge Templates’ and a drop down box containing templates. Select the template you would like to use from this. (If you are unsure of the template to use, please contact your administrator.)
- The rest of the drop downs will show. Select an option from each of the drop downs, in the example below these are Department, Working Rate, Department & Break Duration. Please note: you must select an option from ALL the drop downs.
- Complete the rest of the multiple timesheet as normal. Please note: only one template can be selected for each multiple timesheet, even if you select different customers or projects.
- Click Submit to submit to timesheet(s) for authorisation
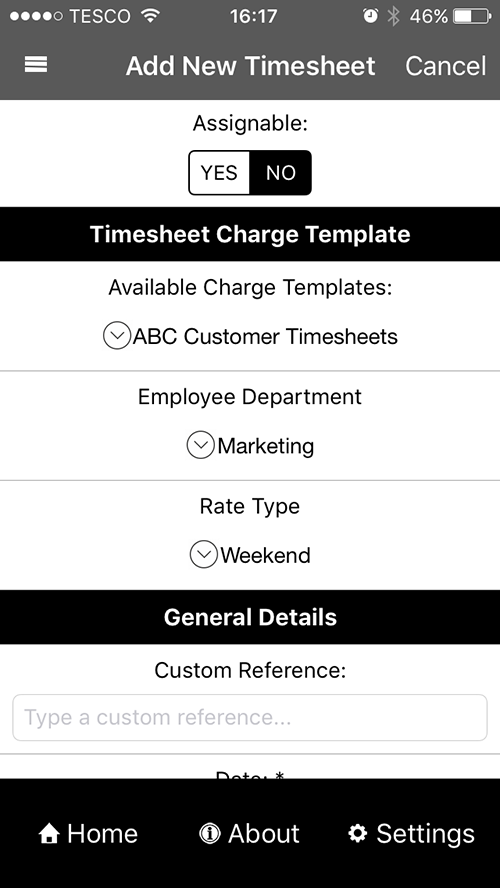
Adding a daily timesheet to a matrix
1. Enter you Clarity365 mobile app and add a timesheet as normal.
2. Under Timesheet Charge Template select an available template
3. Select from the drop downs below
4. Fill in the rest of the timesheet as normal
5. Click 'Submit'