Only Owners & Process Administrators will see the Authorise Self Billing module.
Authorise Self-Billing - Summary
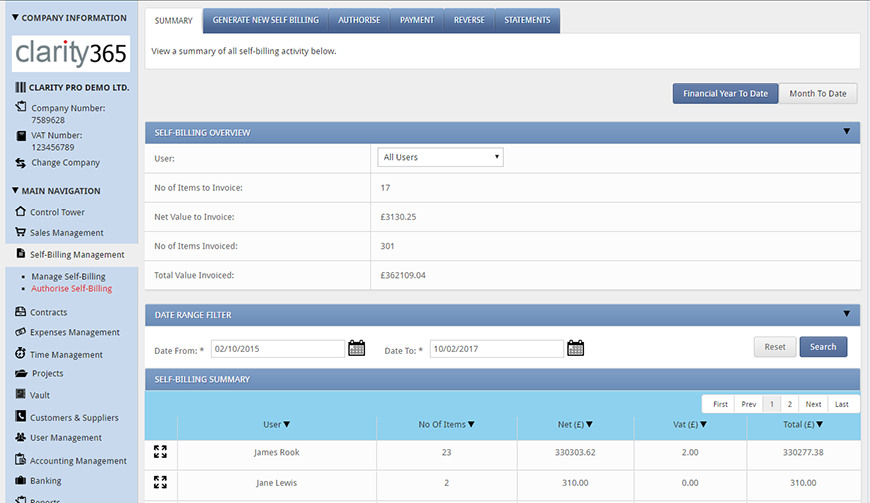
Go to Self-billing management > Authorise self-billing > Summary
View a summary of the self-billing activity of your company. The self-billing overview allows you to select a user from the drop-down options and see the number of items invoiced and total value invoiced by financial year and month to date.
The self-billing summary allows you to view the self-billing invoices by user and status. Drill down further by using the ‘Date range filter’ and clicking 'Search'.
You can also use the filters next to each field ![]() to narrow down your search.
to narrow down your search.
To view the invoices for each user click the 'Expand' icons. View invoice details & download individual invoices as a PDF by clicking the clipboard icon.
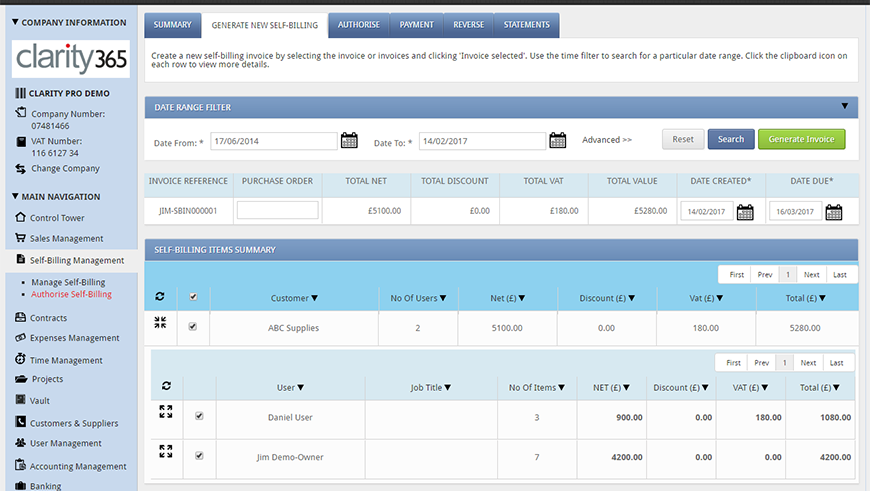
Authorise Self-Billing - Generate New Self-Billing
If a user has billing mode 'Company', then ‘Generate new self-billing’ will show.
To generate a new self-billing invoice, you must have items that have already been invoiced and paid in the Sales Management module. If an owner/ process admin creates a self-billing invoice, then this invoice will automatically go to the ‘Payment’ tab because it does not require authorisation.
1. Go to Self-billing management > Authorise self-billing > Generate New Self Billing
2. Create a new self-billing invoice by clicking ‘Search’ or selecting a date range.
3. Click the drop-down arrow next to the fields on the ‘Self-billing items summary’ to filter by client. Use the ‘Reset filter options’ icon ![]() to change your filter preferences.
to change your filter preferences.
4. Use the 'Expand' icons next to each client to view the users who have worked for this client.
5. Click 'Expand' again to view the individual items for each user. Click the clipboard icon next to each row to ‘Edit item details’ or ‘View item details’.
6. Make sure the items you want to invoice are ticked on the left hand site. Then click ‘Generate Invoice’ to create the self-billing invoice.
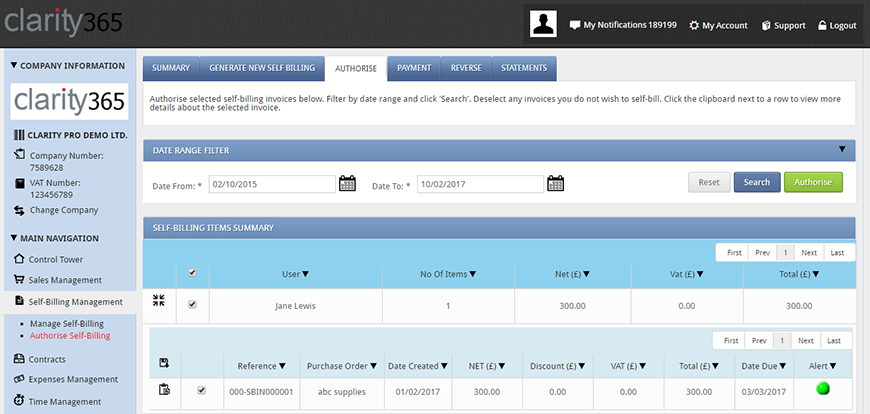
Authorise Self-Billing - Authorise
Authorise selected self-billing invoices in the ‘Authorise self-billing’ tab. To authorise an invoice:
1. Go to Self-billing management > Authorise self-billing > Authorise
2. Filter by date range and click 'Search'.
3. Use the 'Expand' buttons to view the invoices under each user
4. Deselect any invoices you do not wish to self-bill. Click the clipboard next to a row to view more details about the selected invoice.
5. When only those you want to authorise are ticked, click ‘Authorise’.
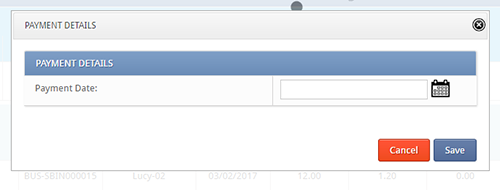
Authorise Self-Billing - Payment
Go to Self-billing management > Authorise self-billing > Payment
This is where you can set a payment date for the self-billing invoice. Select a self-billed invoice or invoices by using the filters.
Expand to view the individual invoices under each user and use the tick boxes to select those you'd like to mark as paid.
Click ‘Pay Invoice’ to set a payment date. A pop up will show prompting you to set a payment date by clicking the calendar icon.
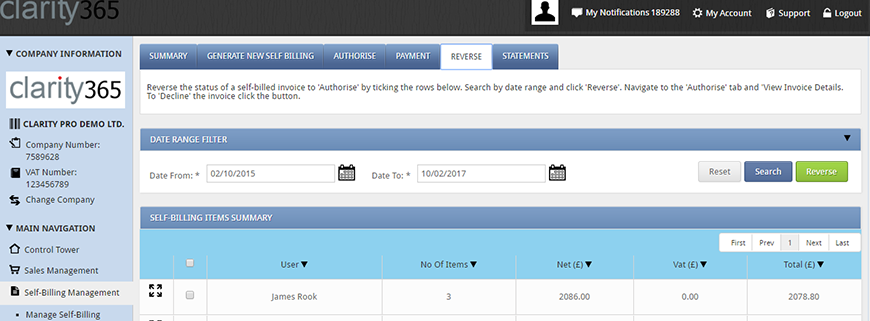
Authorise Self-Billing - Reverse
If you make a mistake and mark a self-billed invoice as paid, the ‘Reverse’ tab will serve you well. You will only see invoices here that have been set as paid.
To reverse the status of a self-billed invoice:
1. Go to Self-billing management > Authorise self-billing > Reverse
2. Choose a date range and click ‘Search’
3. Tick the rows you want to reverse.
4. Click the 'Reverse' button. This will send the self-billed invoice back to the ‘Payment’ tab.
5. On the payment tab, click the clipboard icon to choose whether to ‘Pay’ the invoice again or to ‘Decline’ the invoice. If you click ‘Decline’ this will show as declined and yourself or the user (depending on the billing type) can then recreate the invoice correctly.
Authorise Self-Billing - Statements
Go to Self-billing management > Authorise self-billing > Statements
The ‘Statements’ tab provides you with a statement of your paid self-billed invoices. Use the filters to drill down by user. To export the data click ‘Export' to send an excel version via email.
